Welcome to our comprehensive guide on how to make rugs! Are you looking to add a personal touch to your home decor? Are you tired of searching for that perfect rug and ready to create your own? Look no further! In this guide, we’ll take you through the step-by-step process of making your own rugs at home. Discover the joy of creating personalized decor and adding comfort to your floors with these simple techniques.
Key Takeaways:
- Learn how to make your own beautiful rugs at home.
- Create personalized decor that reflects your personal style.
- Add comfort and warmth to your floors with handmade rugs.
- Discover techniques for selecting the right materials and designing a unique rug.
- Explore weaving techniques and tips for cleaning and maintaining your rug.
Choosing the Right Materials for Your Rug
Before you begin making your rug, it’s crucial to select the right materials to ensure the final outcome meets your expectations. The materials you choose depend on the type of rug you want to create and your personal preferences. Here are some factors to consider when selecting rug materials:
Yarn
If you’re opting for a knotted, tufted, or hooked rug, traditional yarn is a fantastic option. Yarn comes in a wide range of colors, textures, and thicknesses, and can be made from various fibers, including cotton, wool, acrylic, or silk. Cotton is the most affordable yarn option, while wool is the most durable and insulating. Acrylic yarn is lightweight, easy to maintain, and available in vibrant hues.
Fabric
If you’re planning on creating a woven or braided rug, fabric is a popular choice. You can use a variety of materials, including cotton, denim, jute, or even recycled clothing. Fabric rugs are typically less expensive than yarn-based ones, making them an excellent option if you’re on a budget.
When selecting fabric for a rug, consider the thickness, weight, and texture. Denim is a sturdy, heavyweight fabric that can withstand heavy foot traffic. Cotton is lightweight, soft, and comes in vibrant colors and patterns. Jute is a natural fiber with a coarse texture that adds a rustic touch to any design.
Now that you understand the different rug materials available, it’s time to choose the perfect ones for your project. Selecting materials that fit your vision will help ensure the finished rug meets your expectations.
Planning Your Rug Design
Designing your rug is where your creativity can truly shine. Whether you want a patterned rug or a solid color, it’s important to plan your design before you start weaving.
First, consider the room where the rug will be placed. What colors and patterns will complement your existing decor? Do you want the rug to be a statement piece or blend in with the surroundings?
Next, think about the pattern you want to create. Will it be a geometric pattern or a floral design? You can find inspiration from various sources such as other home decor items, nature, or art.
Once you have a general idea of the pattern, it’s time to select the colors. Consider using a color scheme from the room or adding a pop of bold color for contrast. You can also experiment with different shades and tones of the same color for a subtle gradient effect.
Finally, sketch out your design on paper or use a digital design tool to get a better idea of how it will look. Once you’re satisfied with your plan, you’re ready to move on to the next step of the rug making process.
Preparing the Rug Loom or Frame
Before you begin weaving your rug, you need to prepare your rug loom or frame. Setting up your loom or frame properly is crucial for the final outcome of your rug.
If you are using a rug loom, you’ll need to assemble the loom according to the manufacturer’s instructions. The process may differ depending on the type of loom you have.
For a frame, you’ll need to set up the frame by attaching the canvas or fabric to the frame. Make sure the fabric is taut and evenly tensioned.
Once your loom or frame is set up, you can begin to attach your rug materials to the frame.
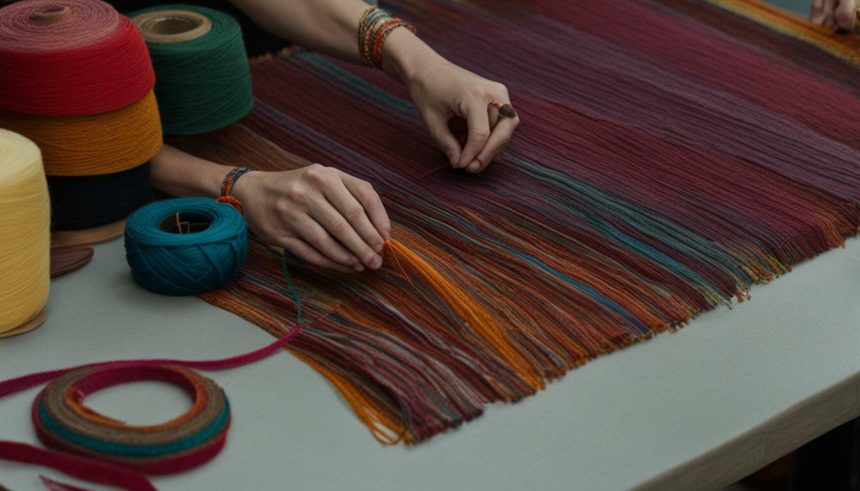
Rug Weaving Techniques
Now that you have your design planned and your loom set up, it’s time to start weaving your rug. There are several rug weaving techniques to choose from, each with their unique benefits and challenges. Here are some of the most popular methods:
- Plain weave: This is the most basic weave and involves passing the weft thread over and under the warp threads in alternating rows. It creates a flat, stable fabric ideal for beginner rug makers.
- Twill weave: This weave involves a diagonal pattern that creates a more textured surface. It’s a great way to add interest to your rug and create a sturdy, durable fabric.
- Knotting: This technique involves tying individual knots in the warp threads to create a raised pile. It’s commonly used for shag rugs and can produce intricate designs and patterns.
Whichever technique you choose, remember to maintain a consistent tension throughout your weaving to ensure an even and sturdy rug. Practice each method until you find the one that works best for your project and skill level.
Adding Texture to Your Rug
Textures can add depth to your rug, making it more visually interesting and tactilely pleasing. Here are some techniques to add that extra something to your rug:
Controlling Pile Height
The pile height, or the length of the fibers of your rug, can impact the texture significantly. For example, a high pile gives a shaggy look while a low pile gives a more polished appearance. To control the pile height, adjust the tension of the warp threads or choose yarn with the desired thickness.
Loop Pile
Loop pile is created by pulling the yarn through the weft threads and then back up through the warp threads, leaving a loop. By varying the length of these loops, you can create a textured pattern on your rug. Consider using loop pile for a cozy and playful look.
High-Low Pile Variations
A high-low pile variation means that parts of your rug are higher than others, creating a multi-dimensional look. To achieve this, use two types of yarn with different thicknesses, and weave them in different patterns. This method will create a rug with interesting texture that catches the eye.
Experiment with these techniques to create a rug with beautiful texture that will add warmth and dimension to any room in your home.
Finishing Touches for Your Rug
After all the hard work of weaving your rug, it’s time to give it the finishing touches that will make it stand out and be functional. The finishing touches also protect your rug from fraying or unraveling, and add an extra layer of style to your creation.
Binding
Binding is a technique used to protect the edges of your rug from fraying and wear over time. There are many types of binding materials available, such as cotton, leather, or synthetic options, and you can select the one that best matches your rug’s color or design. Once you’ve chosen your binding material, it’s time to sew it onto the rug’s edge. You can either hand-stitch or use a sewing machine for this step.
Fringe
Adding fringe is a popular way to finish a rug and give it a decorative touch. Fringes can be made from the same material as your rug or from a contrasting one, depending on the look you’re going for. To add fringe, you’ll need to take bundles of yarn or fabric strips and knot them onto the ends of your rug. The length and thickness of the fringe are up to you, so play around with different options until you find the perfect match for your rug.
| Binding | Fringe |
|---|---|
With these simple finishing touches, you’ll have a beautiful rug that is both functional and stylish. Take the time to choose the right binding materials and fringe options to ensure your rug stays in great shape for years to come.
Cleaning and Maintaining Your Rug
Now that you have created your beautiful rug, it’s important to keep it looking its best. Regular maintenance will help to preserve the fibers and colors, keeping your rug in top condition for years to come. Here are some rug cleaning tips and care instructions:
Rug Maintenance
Regular vacuuming is essential to remove dirt and debris from your rug’s fibers. Use a vacuum with a gentle suction setting and avoid using the beater bar on delicate rugs. Rotate your rug every few months to ensure even wear and exposure to sunlight.
Cleaning Tips
For spills and stains, act quickly to avoid permanent damage. Blot up any excess liquid with a clean cloth, then use a solution of mild detergent and warm water to gently clean the affected area. Rinse thoroughly and blot dry with a towel. Avoid using harsh chemicals or high heat, as this can damage the fibers.
Rug Care
When moving your rug, lift it rather than dragging it to prevent damage to the fibers. Use a rug pad to provide cushioning and prevent slipping. For long-term storage, roll your rug with the pile facing inward and wrap it in acid-free paper to prevent creases and yellowing. Avoid storing in damp or humid areas, as this can lead to mold and mildew growth.
Advanced Rug Making Techniques
Now that you’ve mastered the basics of rug making, it’s time to explore advanced techniques and take your skills to the next level. Creating intricate designs and complex patterns will require patience, practice, and attention to detail, but the results will be well worth the effort. Here are some tips to help you get started:
Experiment with New Materials
Challenge yourself to work with new materials and textures. Consider using alternative fibers like hemp, jute, or silk to create unique and eye-catching designs. You can also try incorporating unconventional items like seashells, beads, or feathers for a one-of-a-kind touch.
Play with Colors and Patterns
Don’t be afraid to mix and match colors and patterns to create bold and striking designs. Try using contrasting colors or playing with geometric shapes to add depth and visual interest to your rug. Remember, the possibilities are endless, so let your creativity run wild.
Master New Techniques
Experimenting with new techniques like tapestry weaving or tufting can add exciting texture and depth to your rug. Take the time to practice and perfect these methods to achieve the desired effect. You can also try creating raised designs with pile weaving techniques or adding dimension with knotting.
Choose a Theme
Creating a rug with a specific theme in mind can be a fun and challenging way to express your creativity. Consider a nature-themed rug with leaves and flowers, or a rug inspired by your favorite work of art or pattern. The key is to choose a theme that resonates with you and allows you to showcase your skills.
With these advanced rug making techniques, you can take your skills to the next level and create beautiful, intricate designs that reflect your personal style. Don’t be afraid to experiment and try new things, and remember that practice makes perfect. Happy rug making!
Rug Making Tips and Troubleshooting
Congratulations on your rug making journey thus far! As with any new skill, it’s natural to encounter some roadblocks along the way. Don’t worry though, we’ve got you covered with some helpful rug making tips and solutions to common problems.
Rug Making Tips
Here are some general tips to keep in mind as you continue your rug making:
- Always double-check your measurements before starting a new section of the rug.
- Take your time and don’t rush the process, as rug making requires patience.
- Keep your work area tidy and organized to avoid getting tangled in your materials.
- Stretch periodically to prevent back and neck pain from long periods of sitting or standing.
Common Problems and Solutions
Here are some common issues that rug makers may encounter, along with solutions:
| Problem | Solution |
|---|---|
| The yarn keeps slipping off the needle | Try using a smaller needle or roughening the surface of the needle with an emery board to create more friction. |
| Uneven edges on finished rug | Make sure to maintain consistent tension throughout the rug, and consider adding a border to even out any irregularities. |
| Rug is curling up at the corners | Try blocking the rug by wetting it and pinning it into the desired shape until it dries. You can also add a non-slip rug pad underneath to prevent curling. |
| The final rug is smaller than expected | Check your tension and gauge, and adjust accordingly to match your desired size. You may also need to adjust your pattern and increase the number of rows or stitches. |
We hope these tips and solutions help you overcome any challenges you face in your rug making journey. Remember to celebrate your progress and enjoy the process!
Conclusion
Congratulations on completing this comprehensive guide on how to make rugs! Now that you have the knowledge and skills, you can start creating unique and personalized home decor that reflects your style.
Remember, choosing the right materials is crucial for a successful rug-making project. Take your time to select the yarn or fabric that best suits your needs and vision. Planning your design, selecting patterns, and choosing a color scheme that complements your home decor is the next step.
Once prepared, setting up your rug loom or frame is essential to ensure a smooth weaving experience. Experiment with different rug weaving techniques like plain weave, twill weave, or knotting to achieve professional-looking results.
Adding texture to your rug with techniques like pile height control, loop pile, or high-low pile variations can elevate its look and feel. The finishing touches, like binding the edges, adding fringe or creating a decorative border, complete your rug, giving it a polished look and preventing unraveling.
Finally, proper maintenance is essential to keep your rug beautiful and long-lasting. Follow the practical tips we provided to clean and care for your rug, and don’t be afraid to experiment with advanced rug making techniques, intricate designs, complex patterns, and unique materials.