Are you looking for a way to add a personal touch to your home decor? Creating your own area rugs is a fun and rewarding DIY project that will allow you to express your creativity while adding warmth and style to your space. In this article, we will guide you through the process of making your own unique and personalized area rugs.
Key Takeaways:
- Learn how to create your own area rugs with our step-by-step guide.
- Add a personal touch to your home decor by making your own bespoke rugs.
- Explore different fabric options, design ideas, and construction techniques to create a rug that complements your style.
- Finish your handmade rug with a polished look by incorporating different finishing techniques and edging options.
- Care and maintenance are important to keep your rugs looking beautiful, and we have tips to make sure yours lasts for years to come.
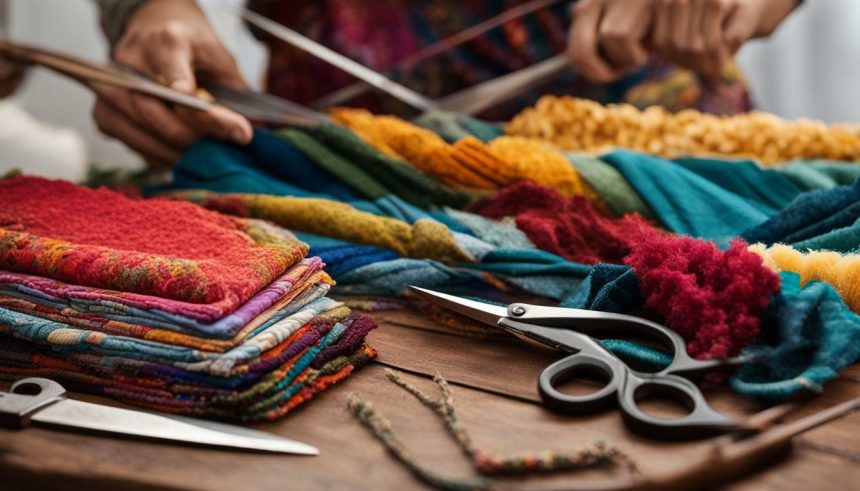
Gather Materials and Tools
Before you start making your own area rugs, it’s essential to gather all the necessary materials and tools. Here’s a list of rug making supplies you’ll need:
| Materials | Tools |
|---|---|
| Rug fabric | Rug hook or loom |
| Rug backing | Rug scissors |
| Rug binding tape or yarn | Ruler or measuring tape |
| Rug padding | Marker or chalk |
You can find rug making supplies at your local craft store or online. Make sure you choose high-quality materials to ensure the longevity and durability of your rug.
When selecting tools, consider the rug making technique you plan to use. For example, a rug hook is necessary for hooking while a loom is required for weaving. Don’t forget to have a pair of sharp scissors to cut the rug fabric and a ruler or measuring tape to ensure accurate measurements.
By having all the necessary materials and tools, you’re ready to start creating your own beautiful and unique area rug.
Choose the Right Fabric
Choosing the right fabric is a crucial step in making your own area rug. The fabric you select will impact the durability, texture, and overall appearance of your rug. There are several fabric options available to choose from, each with its own unique features and benefits.
| Fabric Type | Description |
|---|---|
| Wool | Wool is a popular choice for rug making due to its durability, warmth, and soft texture. It is a natural insulator, making it perfect for colder climates. Wool is also naturally resistant to stains, making it easy to clean and maintain. |
| Cotton | Cotton is another common fabric used for rug making. It is lightweight, easy to handle, and comes in a variety of colors and patterns. Cotton is also a good choice for those who have allergies or prefer a more eco-friendly option. |
| Jute | Jute is a natural fiber that is eco-friendly and biodegradable. It has a rough texture and is quite strong, making it ideal for high-traffic areas. However, due to its coarse texture, it may not be suitable for those with sensitive skin or small children. |
| Sisal | Sisal is a natural fiber that is similar to jute in appearance and texture. It is strong and durable, making it ideal for high-traffic areas. However, like jute, it may not be suitable for those with sensitive skin or small children. |
When selecting the best fabric for your area rug, consider the amount of foot traffic the rug will receive, the overall look and feel you want to achieve, and any practical considerations such as cleaning and maintenance.
Design and Pattern Selection
The design and pattern of your area rug is what will make it truly unique and personalized. There are many rug design ideas to consider, such as geometric patterns, floral motifs, stripes, and abstract designs.
One way to create a pattern for your area rug is to use a stencil. You can purchase pre-made stencils or create your own using cardboard or plastic. Simply lay the stencil on top of the fabric and apply paint or dye with a brush or sponge. Experiment with different colors and designs until you find one that you love.
Another option is to use a rug hooking technique for a more textured look. This method involves pulling loops of yarn through a mesh and can create intricate designs and patterns. You can also add additional details such as fringes or tassels to finish off the rug.
When selecting a design for your area rug, consider the room it will be placed in and the existing decor. You want your rug to complement the space and tie everything together. Don’t be afraid to get creative and try something new!
Rug Construction Techniques
There are various techniques you can use to construct your own area rugs, each with its own unique characteristics. In this section, we will explore different rug-making techniques, including knotting, hooking, and weaving, and provide instructions on how to execute each method.
Knotting
Knotting is a popular rug-making technique that involves tying short strands of thread or yarn around the warp threads to create a pile. This technique is commonly used for creating the luxurious shaggy texture found in many area rugs. To create a knotted rug, follow these steps:
| Step | Instructions |
|---|---|
| 1 | Choose your yarn or thread and cut it into small sections. |
| 2 | Select your warp threads and tie the yarn around each one, making sure to tighten the knot. Cut any excess yarn. |
| 3 | Repeat step 2 for each row, alternating between tying knots around every other warp thread and every third warp thread. |
| 4 | When you reach the end, trim the ends of the yarn to create an even pile. |
Hooking
Hooked rugs are made by pulling loops of yarn or fabric through a base material. This technique is often used for creating intricate designs and patterns. To hook a rug, follow these steps:
| Step | Instructions |
|---|---|
| 1 | Choose your base material and mark out your design or pattern using a template. |
| 2 | Make a small hole in the base material where you want to start your first loop. |
| 3 | Thread your hook through the hole and pull up a loop of yarn or fabric. Hook the yarn or fabric again, creating a new loop that is pulled through the previous loop. |
| 4 | Repeat step 3, pulling loops through the base material until you have completed your design or pattern. |
Weaving
Weaving is a technique that involves interlacing strands of yarn or fabric over and under each other to create a flat woven surface. This technique is commonly used for creating geometric designs and patterns. To weave a rug, follow these steps:
| Step | Instructions |
|---|---|
| 1 | Choose your warp and weft threads, and mount your warp threads onto a loom. |
| 2 | Begin weaving by passing your weft thread over and under the warp threads, creating a tight weave. Be sure to pack the weft threads tightly together to create a sturdy rug. |
| 3 | As you continue weaving, introduce new colors or textures to create your desired design or pattern. |
| 4 | When you reach the end of your rug, bind the warp threads together to finish the edges. |
Each of these rug-making techniques has its own unique advantages and can be used to create beautiful and functional area rugs. Experiment with different materials and colors to create a rug that’s uniquely yours.
Rug Construction Techniques
There are various techniques you can use to construct your own area rugs. Depending on the fabric and design of your rug, some construction methods may be more suitable than others. Here are some rug-making techniques you can try:
Knotting
Knotting is a popular rug-making technique that involves tying knots in the fabric to create a textured and durable surface. There are different knot types you can use, including the Turkish knot, Persian knot, and Tibetan knot. Knotting requires patience and skill, but the end result is a beautiful and long-lasting area rug.
Hooking
Hooking is a technique that involves pulling loops of fabric through a base material using a hook. This method is commonly used with wool or other thick fabrics and can create intricate designs and patterns. Hooking is a faster method compared to knotting, making it a great option for those who want to create a rug in a shorter period.
Weaving
Weaving is a traditional rug-making technique that involves interlacing fibers using a loom. This method can create a variety of textures and patterns, depending on the weaving style and materials used. Weaving is a time-consuming process, but the end result is a high-quality and durable area rug.
Adding Finishing Touches
Once you have completed your rug, adding finishing touches will enhance its overall look and durability. One important aspect of rug finishing is edging, which keeps the rug edges from fraying and adds a polished touch. There are various edging options you can choose from, including binding, serging, and fringing. Binding involves sewing a binding material onto the edges of the rug to prevent fraying. Serging, on the other hand, involves wrapping the edges with a thread to create a smooth and durable finish. Fringing refers to adding a decorative fringe to the edges of the rug for a classic look.
Care and Maintenance
Now that you have completed your beautiful handmade area rug, it’s important to know how to properly care for it to maintain its beauty and longevity.
Rug Care Tips
To keep your rug looking its best, vacuum it regularly to remove dirt and dust. If your rug is reversible, flip it over and vacuum the other side as well. Be sure to use a vacuum with a gentle brush setting to avoid damaging the fibers.
Avoid placing your rug in direct sunlight, as this can cause colors to fade over time. If you need to spot clean your rug, use a mild detergent and a soft-bristled brush to gently scrub the affected area. Rinse the rug thoroughly with water and let it air dry completely before placing it back in its original location.
Cleaning Area Rugs
If your rug needs a deeper cleaning, it’s best to have it professionally cleaned. A professional cleaning service can safely and effectively remove dirt and stains without damaging the fibers or colors of your rug.
Before having your rug professionally cleaned, be sure to check the cleaning instructions provided by the manufacturer. Some rugs may require specialized cleaning methods or solutions.
By following these rug care tips and guidelines, you can help ensure that your handmade area rug remains a beautiful and functional part of your home for many years to come.
Conclusion
You have completed a rewarding journey of creating your own unique area rugs. The possibilities are endless when it comes to rug-making, and we hope this guide has inspired you to explore your creativity further.
Now that you have your own handmade rug, it’s time to showcase it in your home. Whether it’s in your living room, bedroom, or entryway, your personalized creation will be a standout piece that adds warmth and style to any room.
Remember to take proper care of your rug so it can last for years to come. Vacuum it regularly and spot-clean any spills as soon as possible. And most importantly, take pride in knowing that you created something beautiful with your own hands.
We hope you have enjoyed this guide and that it has inspired you to continue your DIY projects. Happy rug-making!